My Recipe Binder

It took me a long time to come up with a way to keep my recipes organized. I have a very simple method now that I stick to most of the time. If I don't stick to it, it's probably because I'm feeling lazy at the moment. 

I have a recipe binder. It's nothing fancy or high tech. But it works! And it's easy to keep up.

I apologize in advance for the poor lighting in these pictures.


Fancy, right?

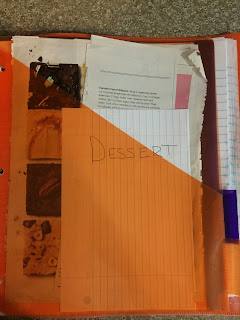
I have my binder separated into different sections. 
Breakfast, Main Dish, Sides, Soups and Salads, Desserts and Misc.


Every two weeks I plan meals. I pull the recipes out of their sections and put them into this plastic page protector that is shown here. When I'm finished making a recipe, it goes back into it's designated section. I'll go over how I meal plan in another post.


When I come across a recipe in a magazine that I want to try, I tear it out and put it in the divider of the section it would go in. This helps me remember to try it and also helps me remember that I haven't tried it, so I better not make that recipe for company!

When I am meal planning, if I'm wanting to try a new recipe, I'll type it up or print it from online. 

Having a recipe binder makes meal planning so much easier! You can flip through it for ideas, and because it's only a binder, if a recipe is not good, it's easy to tear and throw away without messing anything up. 

As you can see, it really is easy! If you have trouble keeping up with your recipes, you should give something like this a try! 

How do you organize your recipes? Let me know in the comments

Comments

Popular posts from this blog

My $100 Kitchen Cabinet Makeover!

I'm so excited to share today's post. It's something I've been working on for about 2 months, on and off. But it is finished and so today I'm sharing how we renovated our kitchen cabinets for about $100. When we bought our house in a little over a year ago, I fell in love with the kitchen just by the listings photos. UPDATE!!! Check out this  post to see how I also stained my island! It was HUGE and there was about a billion cabinets. The kitchen in our old house was a pretty good size also and I knew I would not be content with a smaller kitchen. So these pictures sold me. We bought the house and moved in and I lived with the kitchen for awhile but the cabinet color was really bugging me. I liked the counter tops well enough but they clashed with the cabinets. We did not have the money to replace all those cabinets so the next decision was to either paint or stain them. I stumbled upon General Finishes Gel Stain and thought the id...

$5 Laundry "Room" Update

I don't have a laundry room. I have a laundry closet right off the kitchen. I actually love it there because it is so convenient to keep laundry going through out the day. I wish it was a little bigger and I have future plans down the road, but for now I have to keep it organized or there is just not enough room for it all! Here was the state of my closet before. Not too bad, but there were things in there that shouldn't be in there (a sprinkler??) and it just was cluttered. Not to mention plain and boring. I think I've mentioned before on here how much I love Dollar Tree. If not, I'll say it now. I love Dollar Tree! They have some of the cutest stuff! So I went there today to find some things to organize this with. Here's what I came up with. I bought the 3 aqua colored baskets today and the green and gray tray I was already using.  I wiped everything down and got to work. This is what it looks like now. The two hanging ...

Thrifty Thursday-Marked Down Bread

Today I am sharing a tip that I use to stretch my meals out a little.  I buy marked down Italian bread loaves in the store bakeries.  I bought this loaf for $.72. It was only $1.00 to begin with but $0.28 is $0.28! Plus that's not the only savings you get with this. I love those boxes of frozen garlic toast that are about $3.00 for 6 slices!!! That's crazy. But sometimes, I just really want some bread with my meal. So I slice up the loaf and portion it out in 4 pieces per bag.  I then put all the individual bags in one big freezer bag and freeze. When it's time to eat, just pull out a bag. They thaw quickly. I spread softened butter on each side and sprinkle with garlic salt. I sprinkle with mozzarella cheese and sometimes I add Parmesan cheese. Bake at 375 for about 7 minutes or until they reach the desired crispness. With those other boxes coming in at about $0.50/slice, these are so much cheaper!!